Badger 2040W client for the Raspberry Pi Pixel Server.
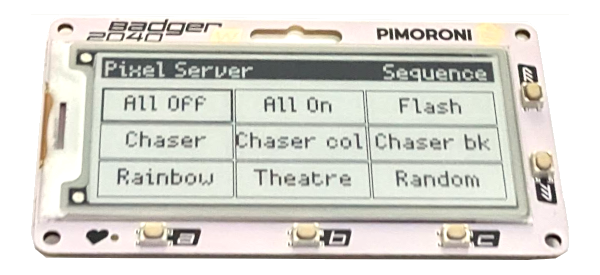
This allows for the control of addressable RGB LED pixels (NeoPixels) using the Badger 2040W hackable ID badge with WiFi. This needs the Raspberry Pi Pixel Server to be installed on a suitable Raspberry Pi and configured.
-
Install the Badger OS image from Pimoroni
-
Update the WiFi login information on the Badger 2040W through the WIFI_CONFIG.py file
-
Copy all the .py files from this repository to the Badger 2040W. This can be done through the Thonny Editor. Turn on the files view to allow you to upload directly, or open the files and use "Save As" selecting to the Raspberry Pi Pico as the destination.
Note: The main.py file will override the Badger OS launcher. This file needs to be called main.py to be called automatically. You could rename the Badger OS main.py which will allow you to restore it in future, or you could save the main.py file under a different name, but it will then need to be launched manually attached to a computer.
- Update the main.py file with the Pixel Server address in the SERVER_ADDR variable.
The needs the Raspberry Pi Pixel Server to be installed and configured.
To use the Badger Pixel Client then the server needs to be configured to allow non-authenticated traffic. For security reasons you should only do this for networks or IP addresses that you trust. For example if you would like to do this for your local network then update auth.cfg with the following entry (update IP address range as necessary):
# Authentication rules for Pixel Server
# Following addresses can access without authentication
network_allow_always = 192.168.0.0/24
# Following allowed, but need to authenticate
# 0.0.0.0 = all addresses
network_allow_auth = 0.0.0.0
For more details see: Penguin Tutor Badger 2040W projects
The current setup is designed to replace the Badger OS which runs on the Badger 2040W. This is so that it can be used as a dedicaed home automation lighting system. It may be possible to add this to the Badger